Understanding the Power of React Context API through a Practical Example
-
 Hashan Hemachandra
 - 10 Mar, 2024
Hi folks 🖖!
Today let try to simply understand the react context hook!
In modern web development, managing state across multiple components can be challenging, especially as applications grow in complexity. The React Context API offers a powerful solution to this problem by enabling developers to share data across the entire component tree, avoiding the cumbersome “prop-drilling” process. Today I will show you importance of the Context API in React, demonstrated through a practical example of a simple text input application.
What is the React Context API?
The React Context API is a way for a React app to effectively produce global variables that can be passed around. This is the alternative to prop drilling or moving props from grandparent to child to parent, and so on. Context is an easier, lighter approach to state management.
A Practical Example: Text Input Application
To illustrate the power of the Context API, let’s dive into a practical example: a simple text input application. In this example, we have two main components: TextInput and InputPreview. The goal is to type text into the TextInput component and have it immediately reflected in the InputPreview component. I will use Next Js for the Example Project.
Project Structure
Our project structure looks like this:
use-context-hook/
├── .next/
├── app/
│   ├── favicon.ico
│   ├── globals.css
│   ├── layout.tsx
│   ├── page.tsx
├── components/
│   ├── InputPreview.tsx
│   ├── TextInput.tsx
├── hooks/
│   ├── useInputContext.tsx
├── node_modules/
├── public/
├── .eslintrc.json
├── .gitignore
├── next-env.d.ts
├── next.config.mjs
├── package-lock.json
├── package.json
├── postcss.config.js
├── README.md
├── tailwind.config.ts
├── tsconfig.json
-
TextInput.tsx: A component for inputting text.
-
InputPreview.tsx: A component for displaying the inputted text.
-
useInputContext.tsx: A custom hook utilizing Context to manage and pass state.
-
page.tsx: A page that renders both components and wraps them with a Context provider.
Creating Context and Provider
In useInputContext.tsx, we define our Context and a provider component. The Context holds the current state of the input text and a function to update this state. This allows any child components to access and modify the input text without needing to pass props down manually.
'use client'

import React, { createContext, useState, useContext } from "react";

// Define the context shape. This is the shape of the data that our context will provide
interface InputContextType {
  inputText: string; // The input text from the user
  setInputText: React.Dispatch<React.SetStateAction<string>>; // A function to set the input text from the user
}

// Create the context with a default value. This sets up the context with a default empty string and a function to set the input text
const InputContext = createContext<InputContextType | undefined>(undefined);

// Create a custom hook for using this context. This hook allows us to access the input text and function to set the input text from the context
export const useInputContext = () => {
  const context = useContext(InputContext); // Get the context from the nearest Provider
  if (!context) { // Check if the context is not defined. This should never happen unless we are not using our provider
    throw new Error("useInputContext must be used within a InputProvider"); // Throw an error if the context is not defined
  }
  return context;
};

// Create a provider component. This component sets up the context and provides it to it's children
export const InputProvider: React.FC<{ children: React.ReactNode }> = ({
  children,
}) => {
  const [inputText, setInputText] = useState(""); // Set up the state for the input text

  return (
    <InputContext.Provider value={{ inputText, setInputText }}> { /*Create a provider for the context and pass in the current input text and function to set the input text */}
      {children} {/* Render the children of this component */}
    </InputContext.Provider>
  );
};
Consuming Context in Components
In our TextInput component, we consume the Context to update the inputText whenever the user types in the input field
// TextInput.tsx
'use client'

import React from 'react';
import { useInputContext } from '@/hooks/useInputContext';

const TextInput = () => {
  const { inputText, setInputText } = useInputContext();

  return (
    <div className="w-96 h-96 bg-gray-100/90 rounded-sm flex flex-col items-center justify-center gap-4 shadow-md">
      <label htmlFor="text">This 👇 is the Input Component</label>
      <input
        type="text"
        value={inputText}
        onChange={(e) => setInputText(e.target.value)}
        name="Name"
        id="text"
        className="border rounded-md"
      />
    </div>
  );
};

export default TextInput;
Similarly, in InputPreview, we consume the Context to display the current inputText.
// InputPreview.tsx
"use client";

import React from "react";
import { useInputContext } from "@/hooks/useInputContext";

const InputPreview = () => {
  const { inputText } = useInputContext();

  return (
    <div className="gap-4 flex-col w-96 h-96 bg-gray-100/90 rounded-sm flex items-center justify-center shadow-md">
      <label htmlFor="text">This 👇 is the Preview Component</label>
      <p className="text-xl">{inputText}</p>
    </div>
  );
};

export default InputPreview;
Assembling the Components
In page.tsx, we assemble our components and wrap them with the InputProvider to ensure that the Context is available to all components that need it.
Run the application using
npm run dev
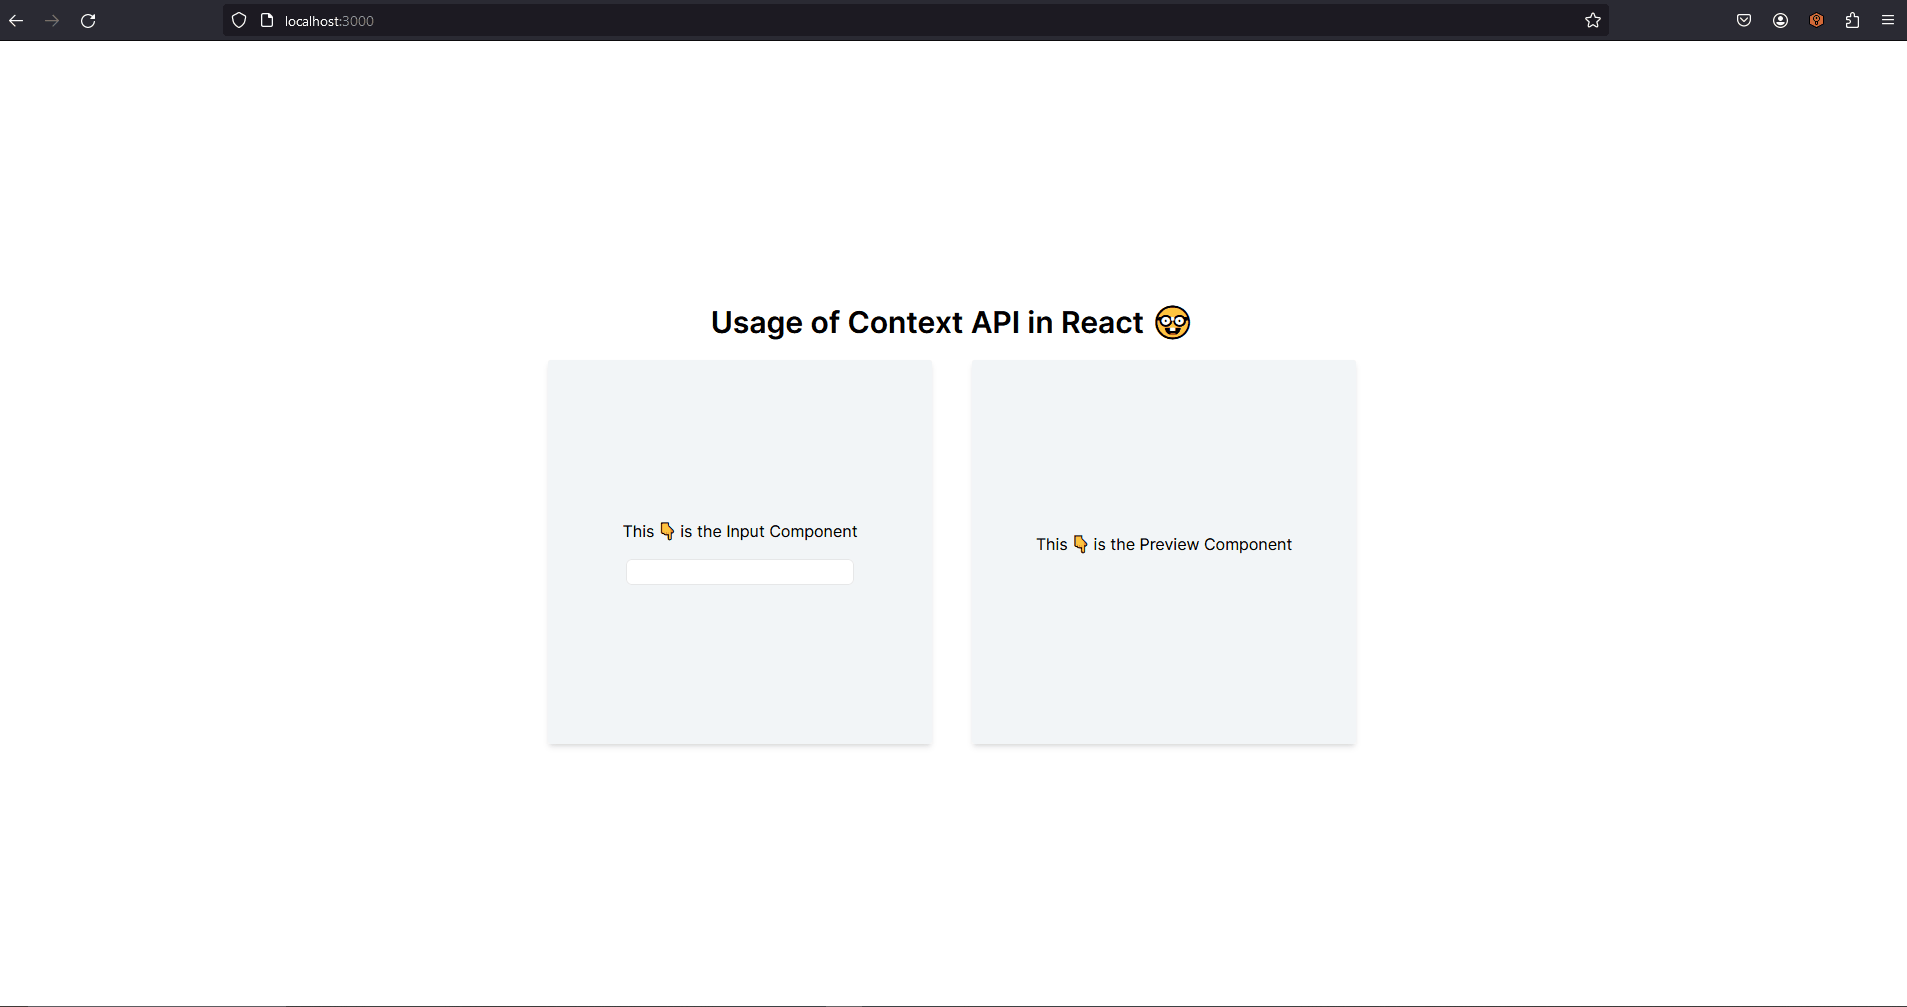
You can see something like this in the web browser:
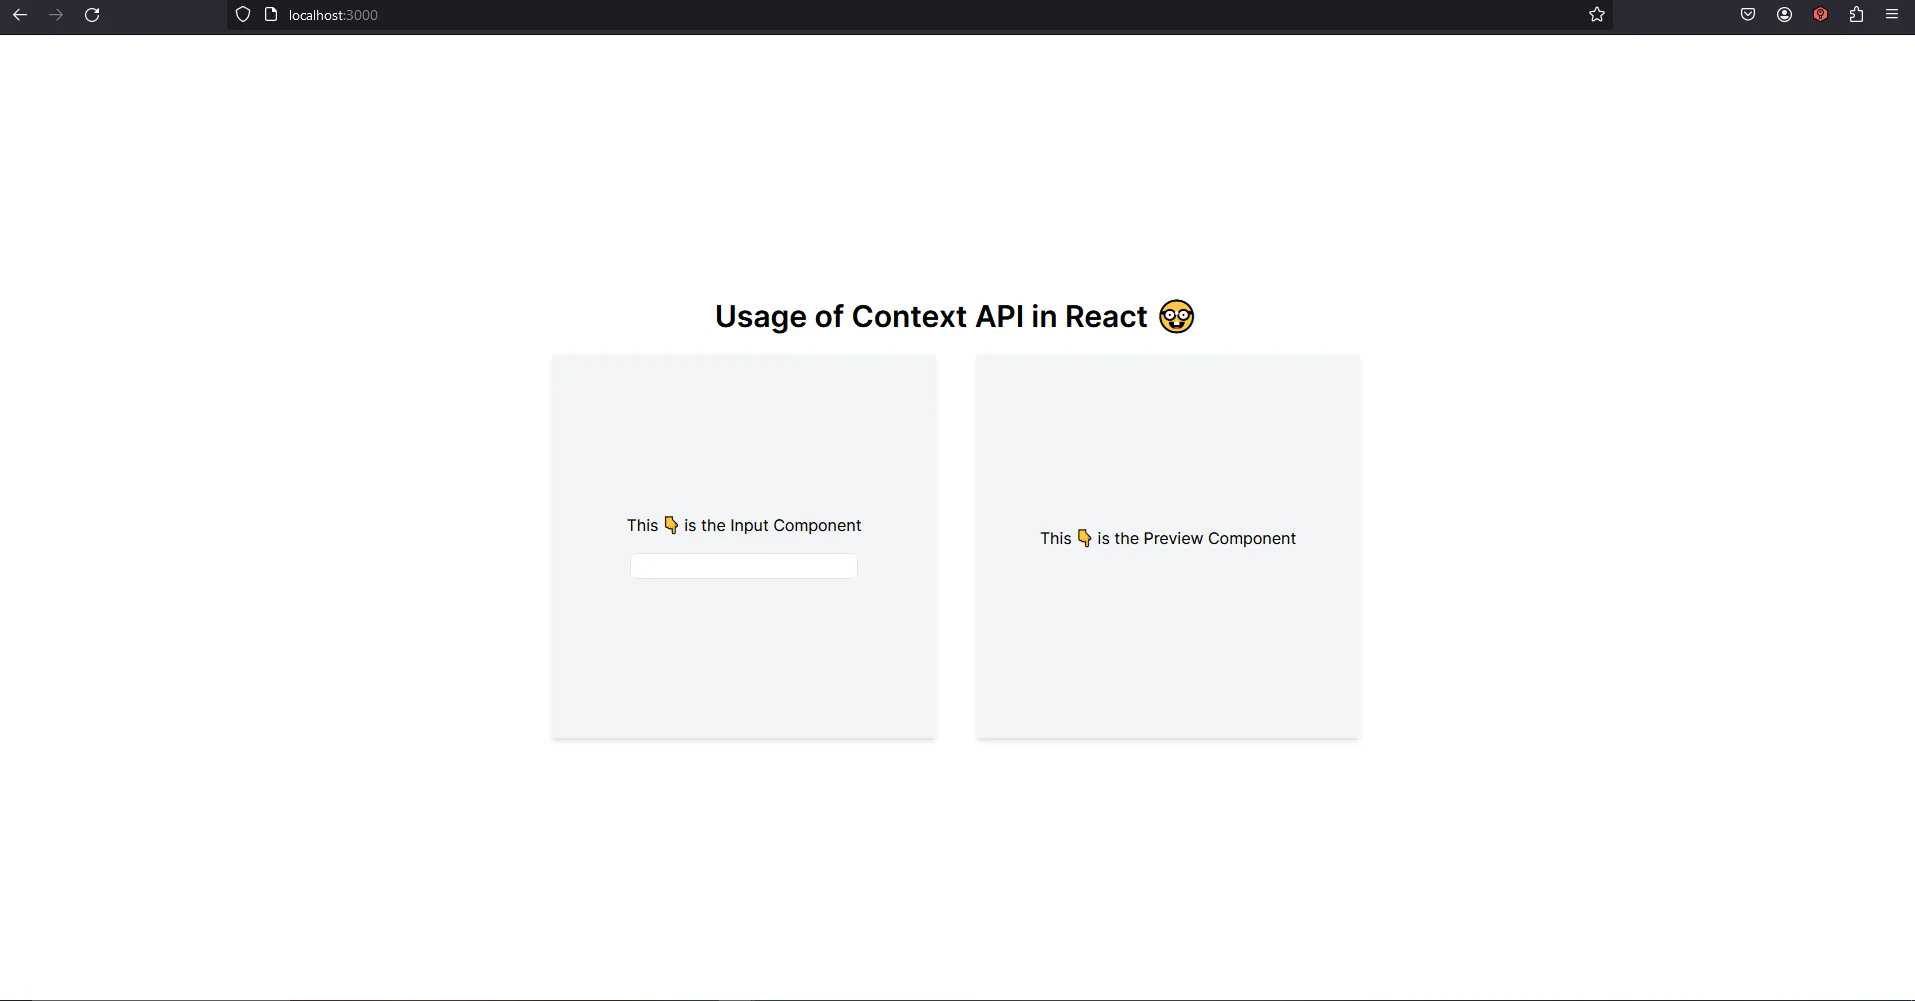
Type something in the Input field, so it will be shown inside the Preview
The Benefits of Using Context API
By using the Context API in our example, we successfully shared state between two sibling components without having to prop-drill through intermediate components. This makes our code more maintainable and easier to understand.
Furthermore, Context API can be a lighter alternative to state management libraries for smaller applications or for specific isolated state management scenarios within larger applications. It simplifies the process of state sharing across components and enhances the scalability of React applications.
I hope you guys understood the basic concept of Context API in React. I will attach the link to repository for further clarifications. Please give me a star if you think effort was worthy.
Repo: Link
Until Next time, Have a good one! Peace ✌️