How to deploy Nest js server to AWS
-
 Hashan Hemachandra
 - 24 Aug, 2023
Hi everyone! 👋
I had the opportunity to work on several project which I had to do deploy on AWS. The most recent challenge I got was to deploy a NestJs backend to AWS RDS.
Here will explain how I completed that task without having to worry about any delays or blockers. This might help another newbie like me 😉
Okay, First of all:
What is NestJs?
NestJS is a framework for building scalable, efficient, and reliable server-side applications. It’s developed with TypeScript and uses Express under the hood, but provides a more structured way to organize your code.
What is Prisma ORM?
Prisma is an open-source database toolkit that includes Prisma Client, Prisma Migrate, and Prisma Studio. Prisma Client is an auto-generated query builder used to access databases in TypeScript and JavaScript applications, which essentially functions as an Object-Relational Mapping (ORM) tool.
What is EC2?
EC2, or Amazon Elastic Compute Cloud, is a web service provided by Amazon Web Services (AWS). It allows users to run virtual servers on-demand, providing resizable compute capacity in the cloud. Essentially, EC2 makes it easier to develop, host, and scale applications by providing complete control of the computing resources.
What is RDS?
Amazon Relational Database Service (RDS) is a managed database service offered by Amazon Web Services (AWS). It simplifies the setup, operation, and scaling of a relational database in the cloud. RDS provides cost-efficient and resizable capacity while automating time-consuming administrative tasks such as hardware provisioning, database setup, patching, and backups.
What is PM2?
PM2 is a popular, open-source process manager for Node.js applications. It provides developers with a set of powerful features to manage and keep their applications online, ensuring that the applications are kept alive forever and enabling management of various application aspects.
What is Git?
Git is a distributed version control system (VCS) that enables multiple people to work on a project simultaneously. It was created by Linus Torvalds in 2005 to support the development of the Linux kernel and has since become one of the most popular version control systems in the world.
Last, but not least 😉, What is MySQL?
MySQL is a popular open-source relational database management system (RDBMS). It’s used as the database component in many software stacks, including the LAMP (Linux, Apache, MySQL, PHP/Perl/Python) and MERN (MongoDB, Express.js, React, Node.js) stacks.
Let’s Get into Business 😎
Step 1 - Setting up EC2 for Nest Js
First log into your AWS account, there search ec2 inside the services search bar. Then select the EC2 from the drop-down list. Once you click that, it’ll take you to the EC2 Dashboard.
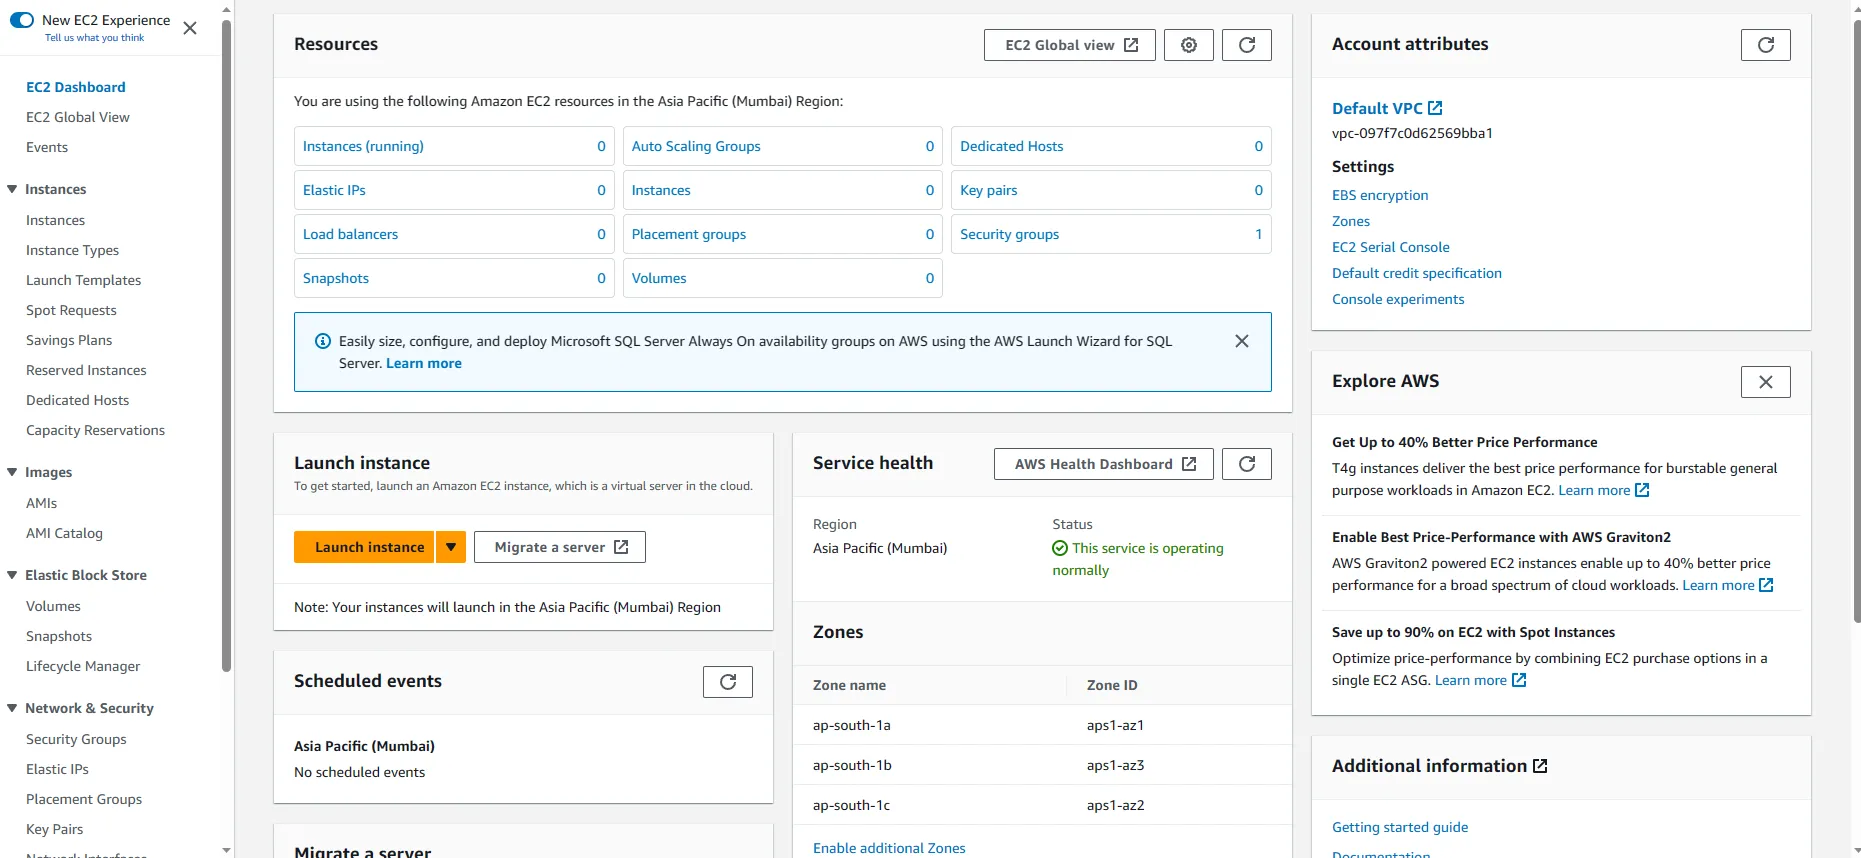
Next click on Launch Instance button. It’ll show you the flow to create your new instance. Under the Name and tags section, name your instance as your preference.
As the next step, you will have to select the operating system for your virtual machine. There I will select Amazon Linux 2023 AMI as my OS.
For the Instance type, you can choose it as for your preference. I would highly recommend do some research on it according to your need using AWS price calculator to avoid unexpected bill amount. Here you can find the type of instances available in EC2. I will use t2.micro instance type just for the demo purpose.
Okay, next thing is the one I most concern about. It’s about how you log into your ec2 instance. In the Key pair (login) section, you can create a key file to log into your system using SSH command. Keep it safely on your computer. Do not share it publicly. I will show you below how to create it.
Download your-key.pem file to a safe location inside your local machine.
Inside the Network settings you need to setup your firewall or security group. A security group is a set of firewall rules that control the traffic for your instance. Add rules to allow specific traffic to reach your instance. There you need to specify, only to allow SSH traffic from your IP. I will show you how to do it. It will only allow SSH access to you server only from your local PC. That increases the security.
I will keep the Configure storage settings as it is and will jump into Advanced details section. There you can set Shutdown behavior to Stop and Terminate protection to enable, just in case if you accidentally shutdown the server, to make sure it won’t terminate the instance and to protect instance by accidental terminates. If you insist on terminating the instance, you can change this setting afterwards.
I will keep every other setting as it is. In right side it’ll show you a summary of what you chose. Then I will click the Launch instance button. It’ll show you launch of the instance.
Now we have our AWS EC2 Instance up and running. Great! 🙌
Now let try to access the server instance using SSH key we downloaded.
First, Go to Instances and there you can see your instance and Instance state will show as Running. Click inside the checkbox and then connect.

Then it’ll show you this window.
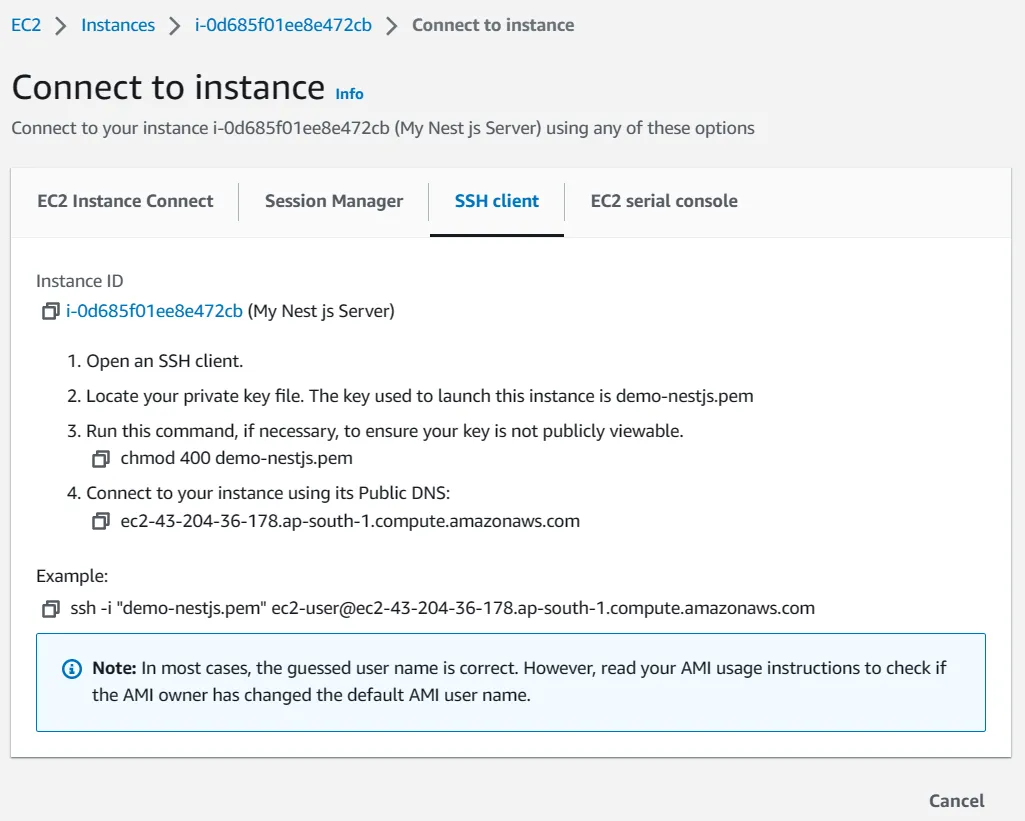
Now go to your folder where you downloaded the .pem file. Right click inside the folder and open any terminal window you have. I will choose Git Bash Here. I would highly recommend it to you. It has helped me a lot when it comes to the deploying.
It’ll open the Git bash CLI inside the folder. We are doing this because we have to, we need to be the same folder as where the Key-pem file located. Otherwise, you will have to give the path to the pem file. I find this way is easier and reduce the flows.
Note
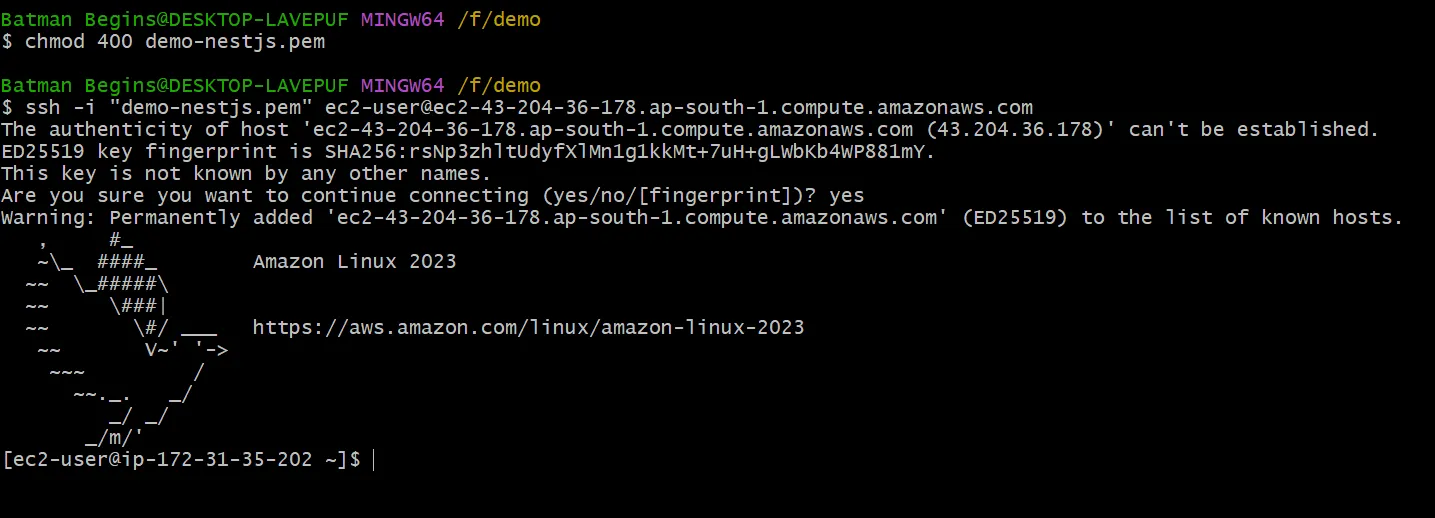
Then copy the example ssh command given, and run it on terminal. Then it’ll ask,
“Are you sure you want to continue connecting (yes/no/[fingerprint])?”.
Then answer yes and press Enter. Then, only using above SSH command and PEM key file, you can access your server every time. Great! Now that we are connected to the instance.
Let’s now install all the dependencies we require. First let’s install Node.js. We can install Node using Node Version Manager (NVM). Copy , Pase and run below commands inside Git Bash.
$ curl -o- https://raw.githubusercontent.com/nvm-sh/nvm/v0.39.4/install.sh | bash
Activate nvm by running below commands:
$ . ~/.nvm/nvm.sh
Use nvm to install the latest version of Node.js
$ nvm install --lts
This will install the latest version of the Node.js. You can check the version using this command
$ node -e "console.log('Running Node.js ' + process.version)"
So good so far 🧐. Now we have installed the Node.js to our instance. Next step is to install Git. Before that check if there any available updates using this command:
$ sudo yum update -y
Then install git to your EC2 instance:
$ sudo yum install git -y
Okay. Now we have installed the Git to our instance and ready to clone the repository. I have a test repository in my github account. I will use that one for demo purpose. If anyone needs it, feel free to fork it 🥰. Don’t forget to leave a star 😇.
Here is the Link: hmalindu1/nest-rest-api (github.com)
Now, let’s clone it into our EC2 instance. First copy the HTTPS URL from the repo:
https://github.com/hmalindu1/nest-rest-api.git
Then go to you EC2 instance and clone it using following command:
$ git clone https://github.com/hmalindu1/nest-rest-api.git
Let’s check our repository by following command:
$ ls
Let’s go inside the “nest-rest-api” folder and install all the dependencies.
# go inside the folder:

$ cd nest-rest-api

# install npm packages:

$ npm install
Lets then isnstall Nest js CLI globally using following command
$ npm install -g @nestjs/cli
Then you can varify the Nest js installation by running following command
$ nest -v
Okay. If it shows the Nest Js version, it means the Nest js have been installed successfully. Great! Now we have setup our EC2 instance 🥳.
Step 2 - Setting up RDS for MySQL
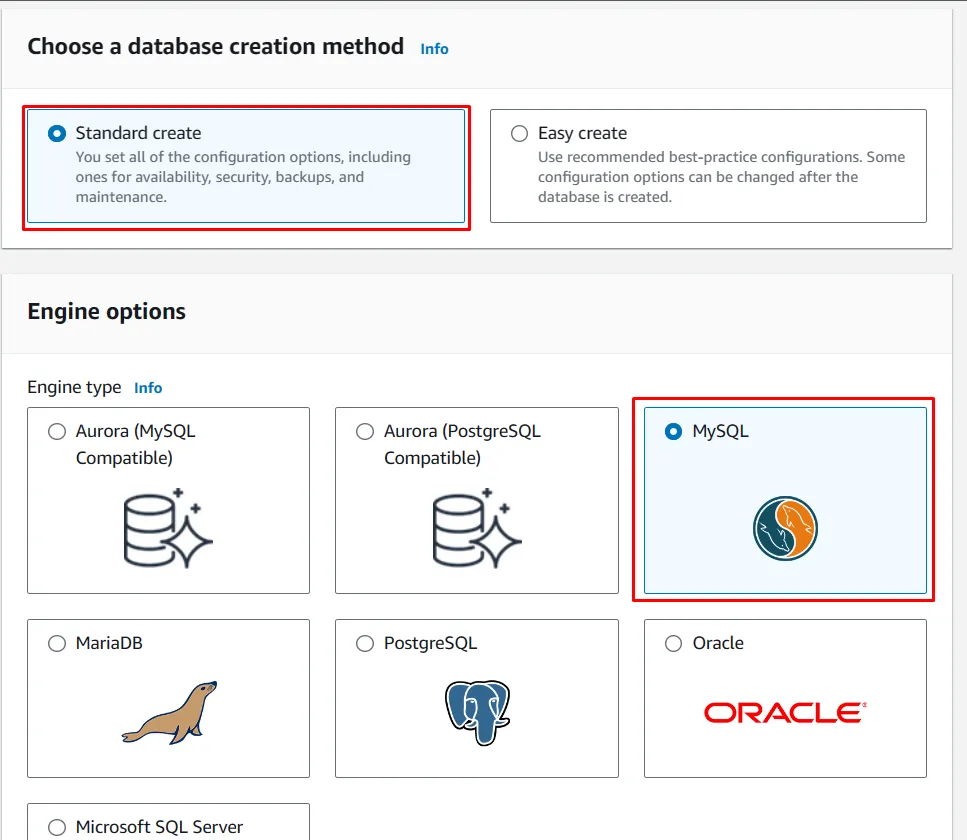
As the next step, now we have to setup our MySQL database inside RDS. Go to your AWS account and search as “rds”. Click the first one from list
Then click Create database button at the dashboard. Select the MySQL as the Engine Type
Then on the Menu below, you can select the Engine Version. I’ll select the latest version.
Select the Template type as you preferance. I will select the Free tier option since I am making a demo here.
Next, Set DB instance identifier, Master username and Password for the DB Instance. Save the Username and Password in a safer place because you are going to need this afterwards to setup the database connection.
I will keep Instance configuration as it is. Since we have choose the Free tier, we don’t have much options to choose. Also I will not change anything on Storage section as well.
Now we will setup the Connectivity. There I will choose the Computer resource as Connect to an EC2 computer resource. Then it will ask you to choose an EC2 instance. You can choose the instance you previously created.
Under the DB subnet group, choose Automatic setup. It’ll create new rules to connect your EC2 with RDS. Under the VPC security group (firewall), choose Create new option. Then enter a new VPC security group name.
I will leave Database authentication as it is. Inside Additional configuration, Database options set the Initial database name for your NestJs API. I will name it as nest_test. The last option you can see Delete protection. If you want you can Enable it. I will keep other options as it is.
Finally I will click on Create database Button at the bottom of the page. It’ll initiate the database creation and will show a blue notification top of the screen.
Click on the View credential details button shown inside that notification. Then again you can see the Master username and Master password. Additionally, you can see the End point given there. Copy all those information into a safer location.
Great! Now we have launched our EC2 instance and RDS instance 🥳.
Step 3 - Connecting NestJs server with MySQL Database
Again, let’s jump into GitBash. And let’s access the EC2 instance using PEM file. Remember! if in any case, your internet connection got restarted, It’ll change your current IP address. It’ll make time out error on port 22.
So you can go to EC2 > Security Groups > You-ec2-security-group > Edit inbound rules. Delete existing rule for SSH and add you new IP address and save the current setting. It’ll again give the access to you.
Okay. Now let’s login again to our instance. Here, we have to install MySQL command-line client first to communicate with the Database. I will attach official AWS website guide. Feel free to go along with it. Run the following command.
$ sudo dnf install mariadb105
After installation, run the following command.
$ mysql -V
If the MySQL command line is correctly installed in you EC2, it’ll show you the MariaDB version.
Now let’s connect to our RDS, and access MySQL and check whether the Database we created is exist or not. Use following command for it.
$ mysql -h <endpoint> -P 3306 -u <mymasteruser> -p
Here you have to enter your endpoint and you master username. For an example
$ mysql -h nestjs-rest-api-database.cuhujxbkqodz.ap-south-1.rds.amazonaws.com -P 3306 -u nestjsadmin -p
like this.
After you run this command, it’ll ask you master password. Enter it, then you will be inside the MySQL database engine.
Enter following command to check Databases.
SHOW DATABASES;
Then you can see the Database name you selected at the beginning of creating the RDS instance exist there.
Great! So far, no hustle 🤠
Now let’s exit from the MySQL command line and create the .env file inside the project folder. Go to the hosted folder and run following commands:
To create a new .env file:
$ touch .env
Now lets open the .env file and edit that.
$ sudo nano .env
Then paste the below Database URL and replace it with your credentials.
DATABASE_URL=“mysql://you_master_username:your_master_password@your_RDS_endpoint:3306/your_database”
Then save this information inside you .env file and exit from the edit window.
Great! Now it’s time to run the Prisma migrate query to our database. If everything worked as expected , This command should run without an issue. Let see 👀
Run the following command:
$ npx prisma migrate dev
voilà 😅
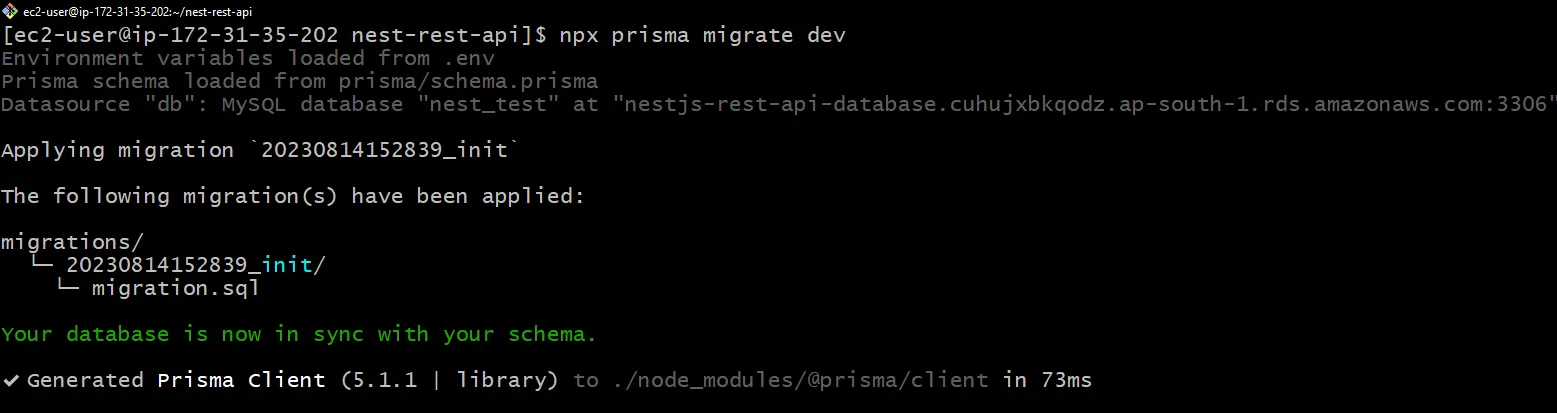
It ran successfully and now we are in sync! Great!
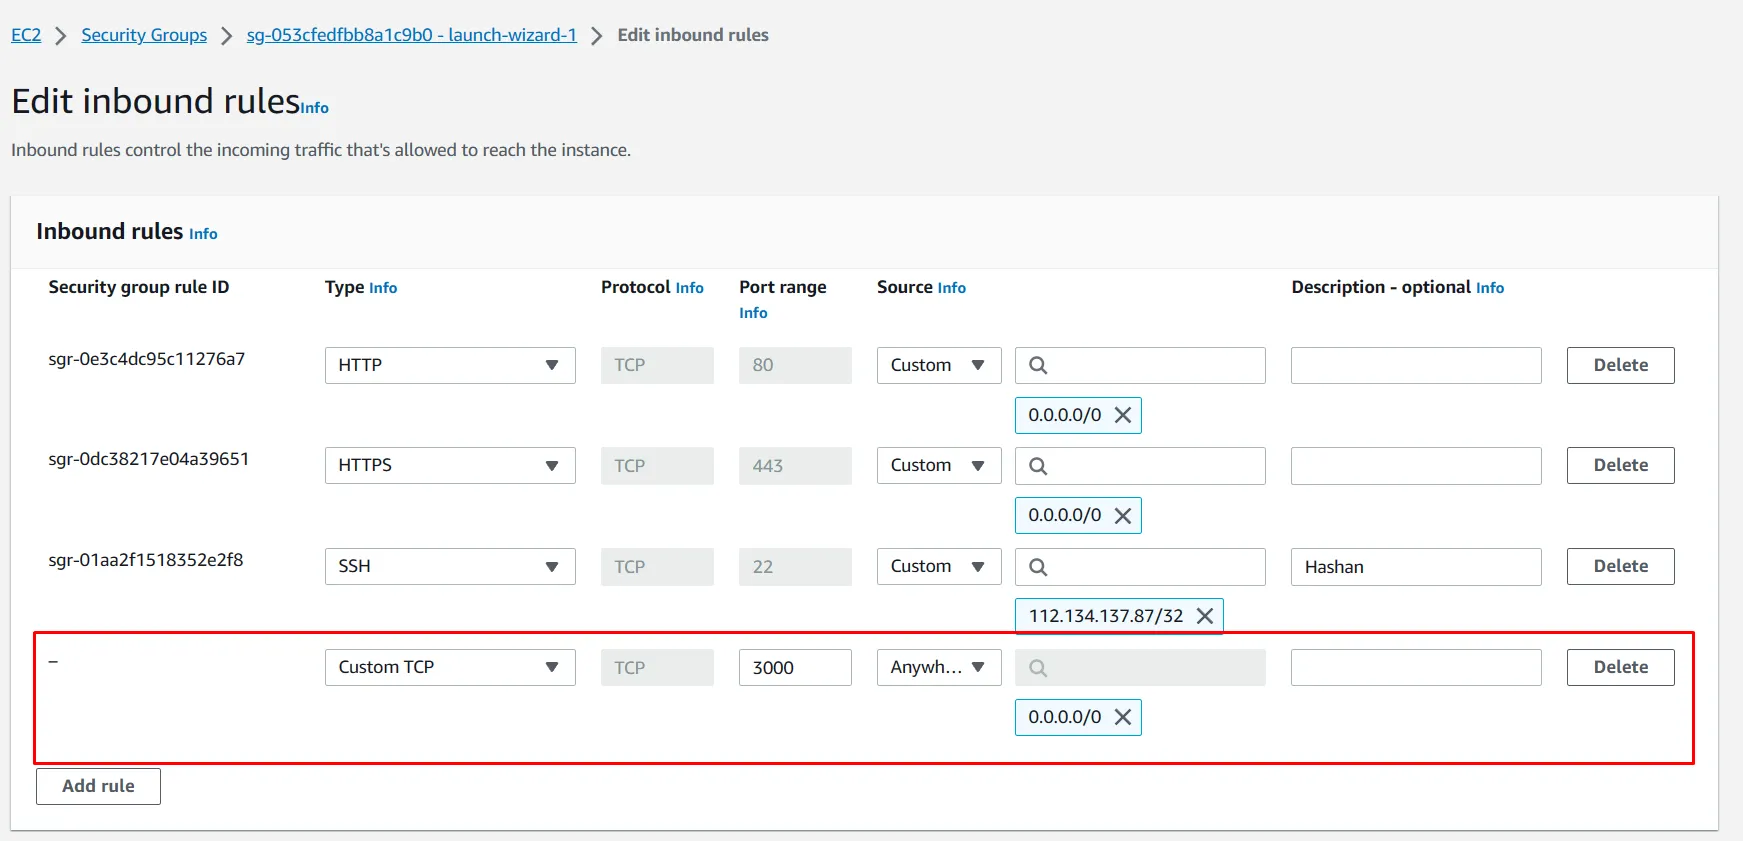
Now let’s make the port 3000 available for Anywhere-IPv4 from the security rules. Otherwise, we won’t be able to access the Nestjs APIs. Because in Default, NestJs is running on port 3000.
Now let’s try to run our nestjs app on server. Fingers crossed 🤞. Let’s hope for the best. Run the following command inside the project folder:
$ npm run start

Yay!! 💪 Now we have started our nestJs application successfully!!
Let’s try to access the API route using our browser.
So I have a route in my local like this “http://localhost:3000/items”. This is the route I tested the GET and POST methods using Postman.
So now lets replace “localhost” with the EC2 Public IPv4 address. Like this
http://3.109.181.207:3000/items
Let’s try this in browser
Great! No errors. Which means, now we have our NestJs server running successfully, and all the ports are configured.
Okay now the thing is, if we exit from the terminal. It’ll stop the NestJs app. So to make the app run continuously, we have to use PM2.
Step 4 - Setting up PM2 for continuous running of the NestJs app
Let’s install PM2 in our EC2 instance. Run following command:
$ npm install pm2 -g
Then go to you NestJs app folder and open package.json file.
# go to your NestJs app folder

$ cd nest-rest-api

# open package.json file

$ sudo nano package.json
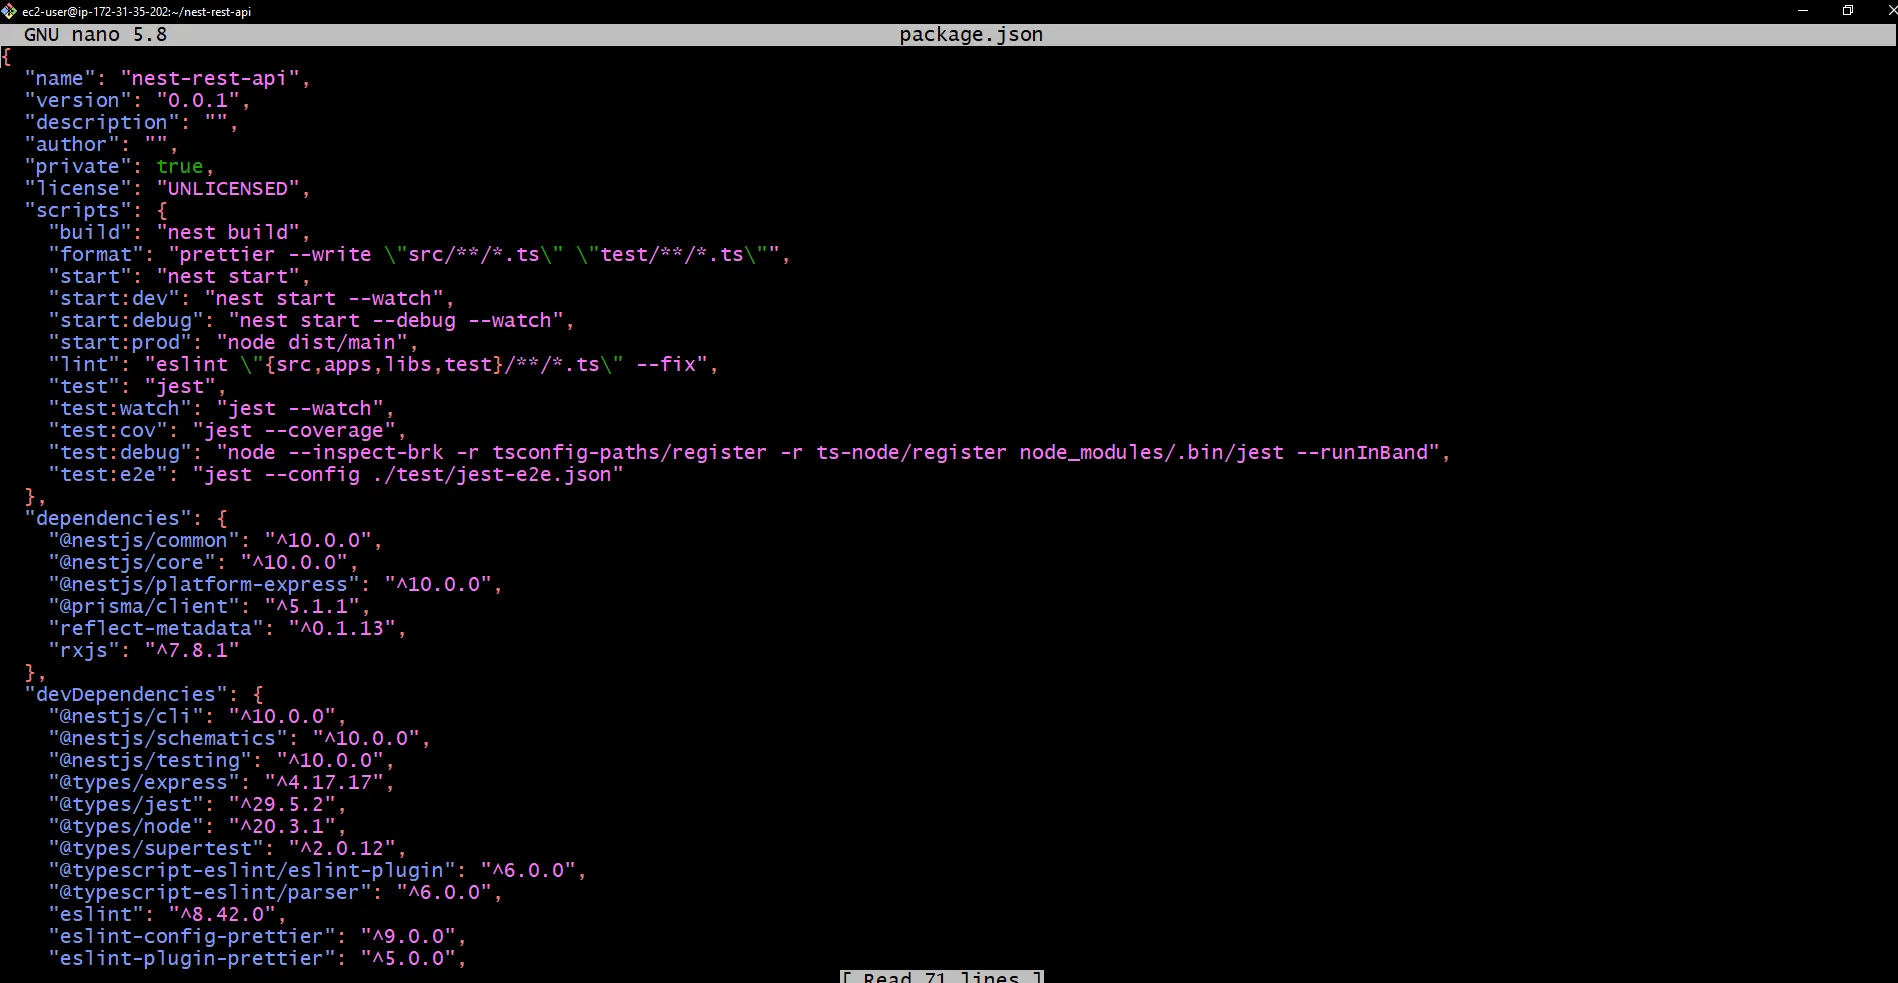
Inside this file, you can see the name of your NestJs app. For an example, my nestJs app name is nest-rest-api. Using this name, let’s add some scripts to package.json to run our NestJs app continuously with the help of PM2.
Add a new script called pm2:start or another name of your choice. It should look like this:
"scripts": {
  "start": "nest start",
  "pm2:start": "pm2 start npm --name 'nest-rest-api' -- start",
  "pm2:stop": "pm2 stop nest-rest-api",
  }
Now let’s run our NestJs app using PM2. Run the following command.
$ npm run pm2:start
Great! Now our NestJs app is running without any interuptions. You can check the status of you application using following command.
$ pm2 status
Also, you can check the log of the PM2 using following command.
$ pm2 logs

Now as you can see in the logs, it states as, Nest application successfully started